With AI (Artificial Intelligence) so prominent these days, it’s easy to feel like the sky…
Metadata, Watermarks, and Image Protection
I recently had an interesting Twitter discussion with Darren Booth about metadata and protecting artwork online. Darren expressed disbelief at how many illustrators don’t include metadata in their files when posting their work to the web and was wondering if there was something he was missing. My answer—and this is not meant to support not including metadata—was that there was a trend to strip it to make smaller file sizes. As we discussed this more on Twitter, it got me thinking generally about how illustrators can protect their work online and what trade-offs, if any, they sacrifice by doing so.
Metadata
First, to discuss Darren’s point, let’s talk about what metadata even is. Metadata is embedded information that’s included in every saved file. It can contain a number of different things, including author information, copyright information, the program the file was created in, and even the make, model, and settings of camera used if the image is a photograph. Here’s an example of the metadata included in a demo file I set up:
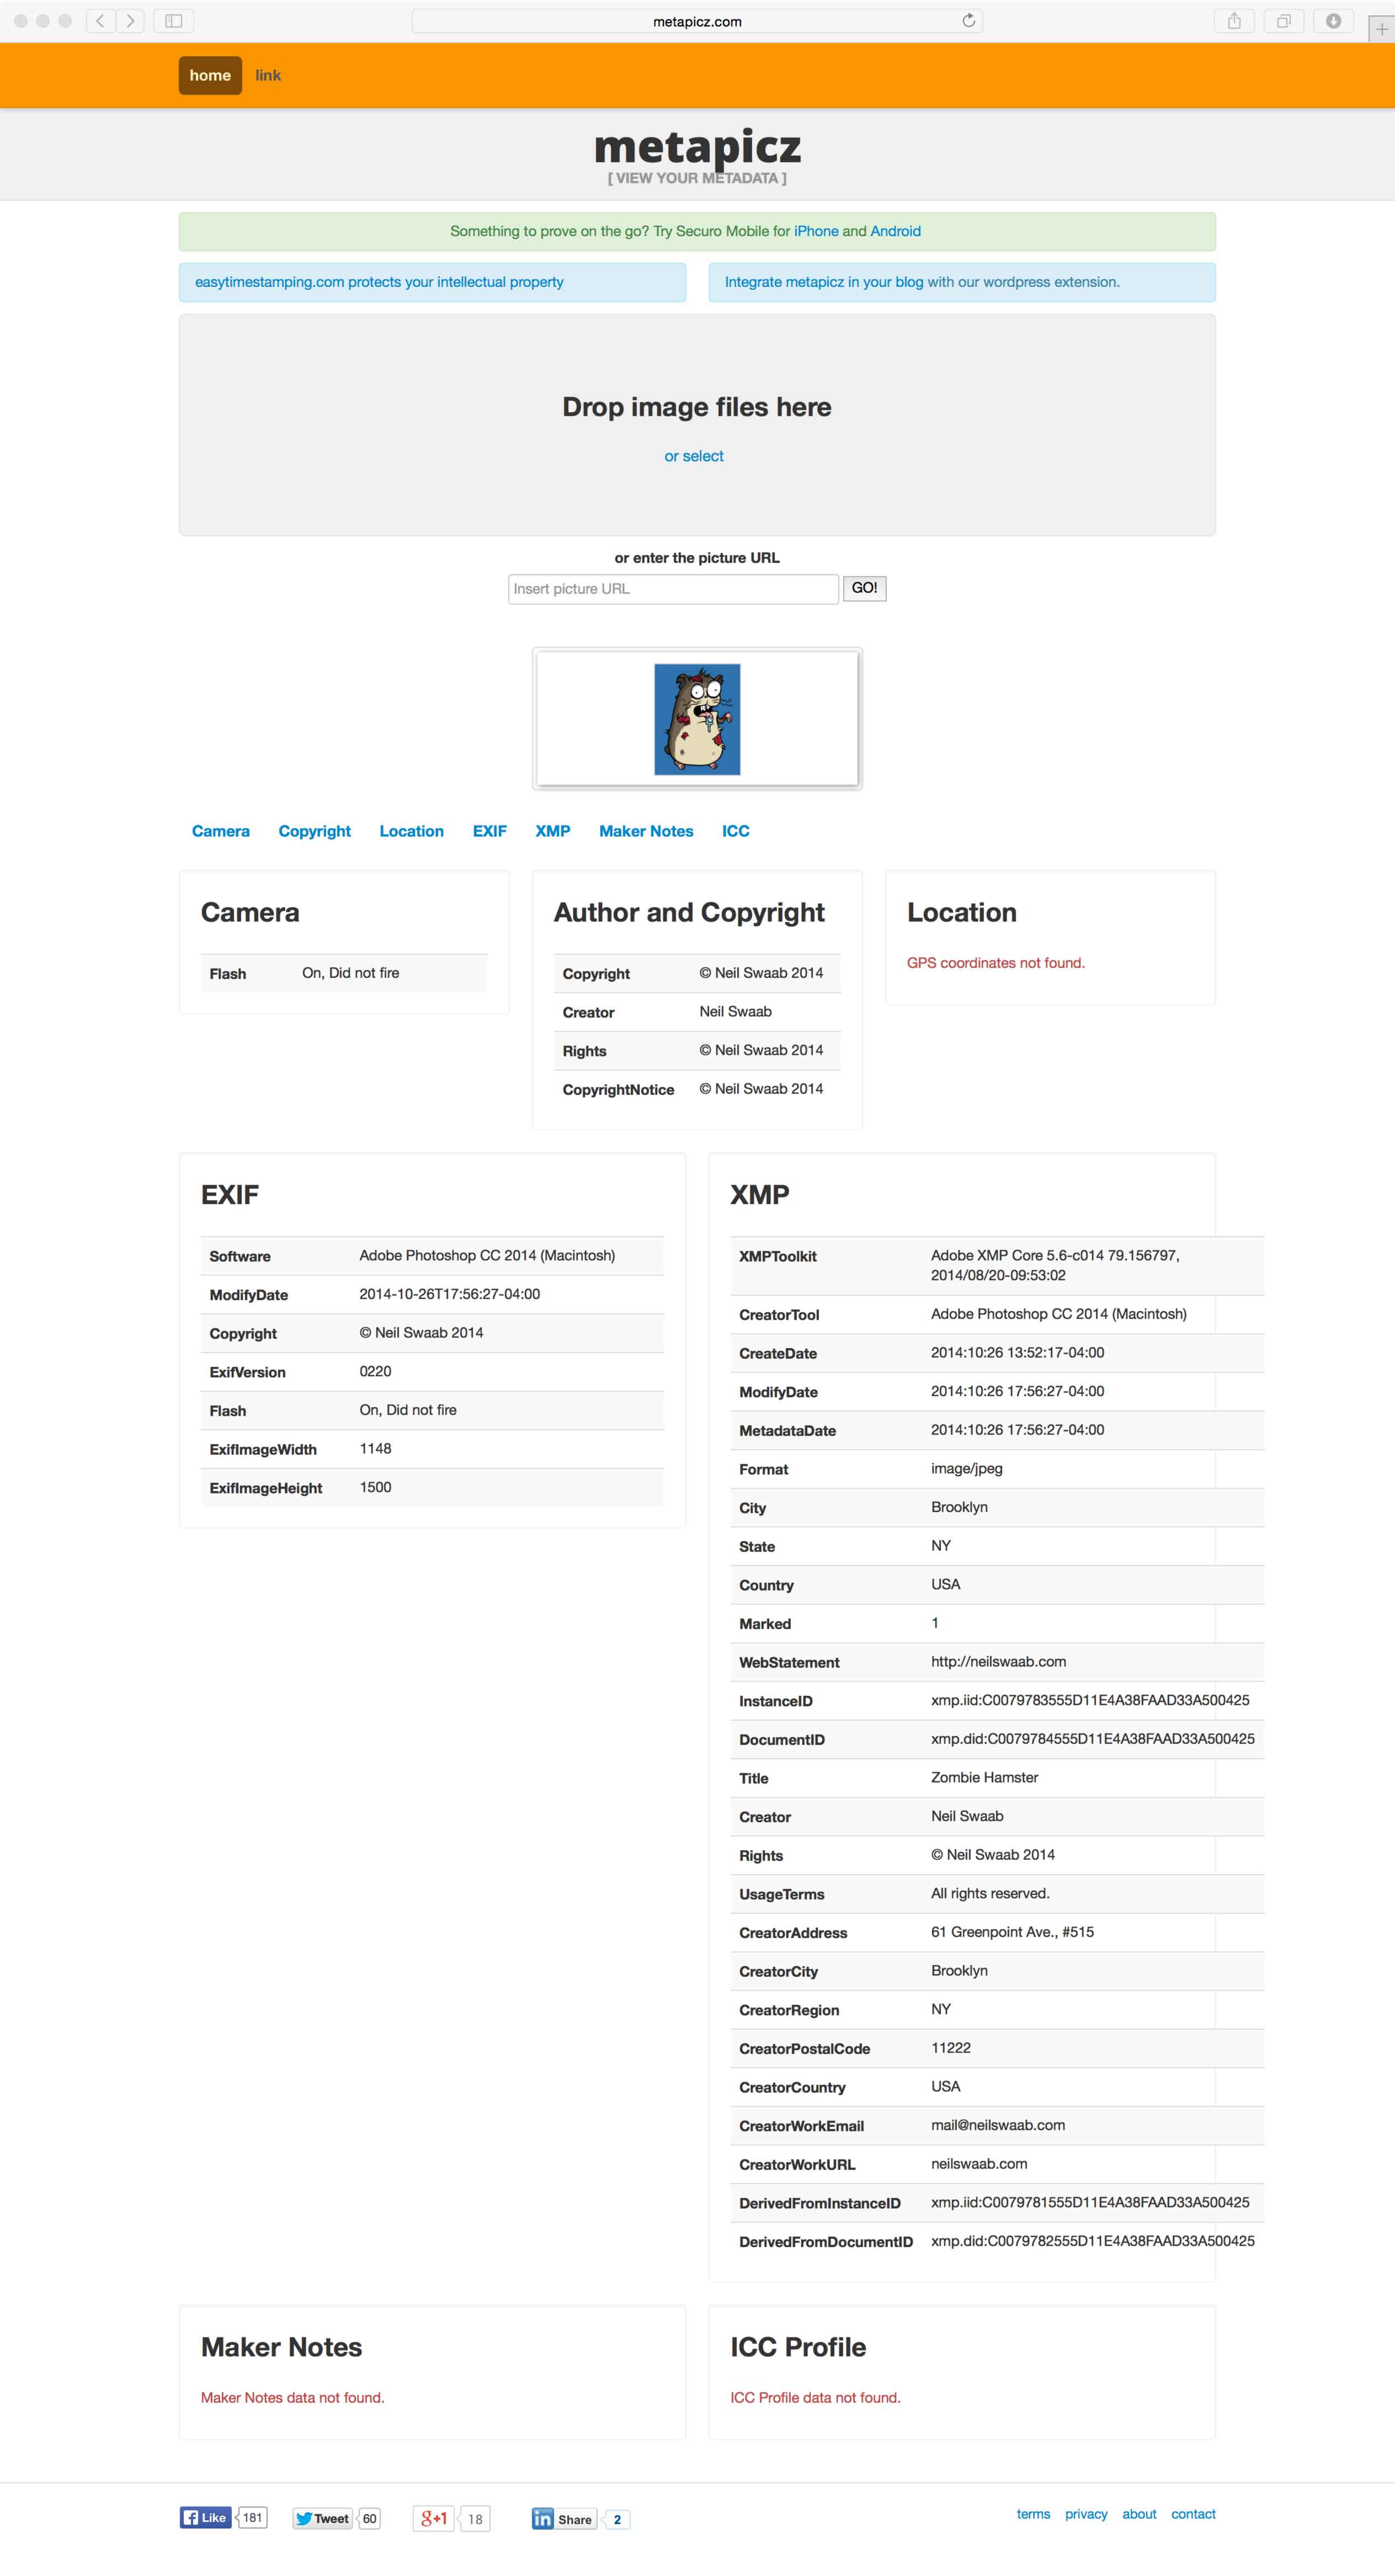
As you can see, that’s quite a lot of information. Anyone who knows how to view metadata can clearly see that I created the file on a certain date and have all my necessary contact and copyright info included. This is all good stuff and could really help me if someone chose to steal my image. Many illustration thieves don’t even know about metadata and fail to strip images of it, so it can be a great resource for you to protect your work and is highly recommended.
So why is there a trend for some people to get rid of it? Put simply, file size. As we’re moving more towards retina displays, image sizes are getting increasingly larger. Stripping metadata can bring your image size down anywhere from 1–5%. While this is not a huge savings, when you have thirty thumbnails on a page or an extensive case study, it can certainly add up. Now, I’m not saying that people shouldn’t include metadata in their files—in fact, the opposite—I’m just saying why some people may not want it.
The fact is, for every type of image protection you add, there will always be a tradeoff. For metadata, the tradeoff is slightly larger image sizes and download time. It’s up to you to determine which is more important.
So, how do you add metadata if you want to? Well, some basic metadata is added automatically in any file you create. However, if you want to add specific metadata in Photoshop or Illustrator, you can do so by going to File > File info… in either program and adding in whatever parts are relevant.

You’ll also need to make sure that when you choose Save for web… that you enable Metadata in the dialogue box options as shown below.
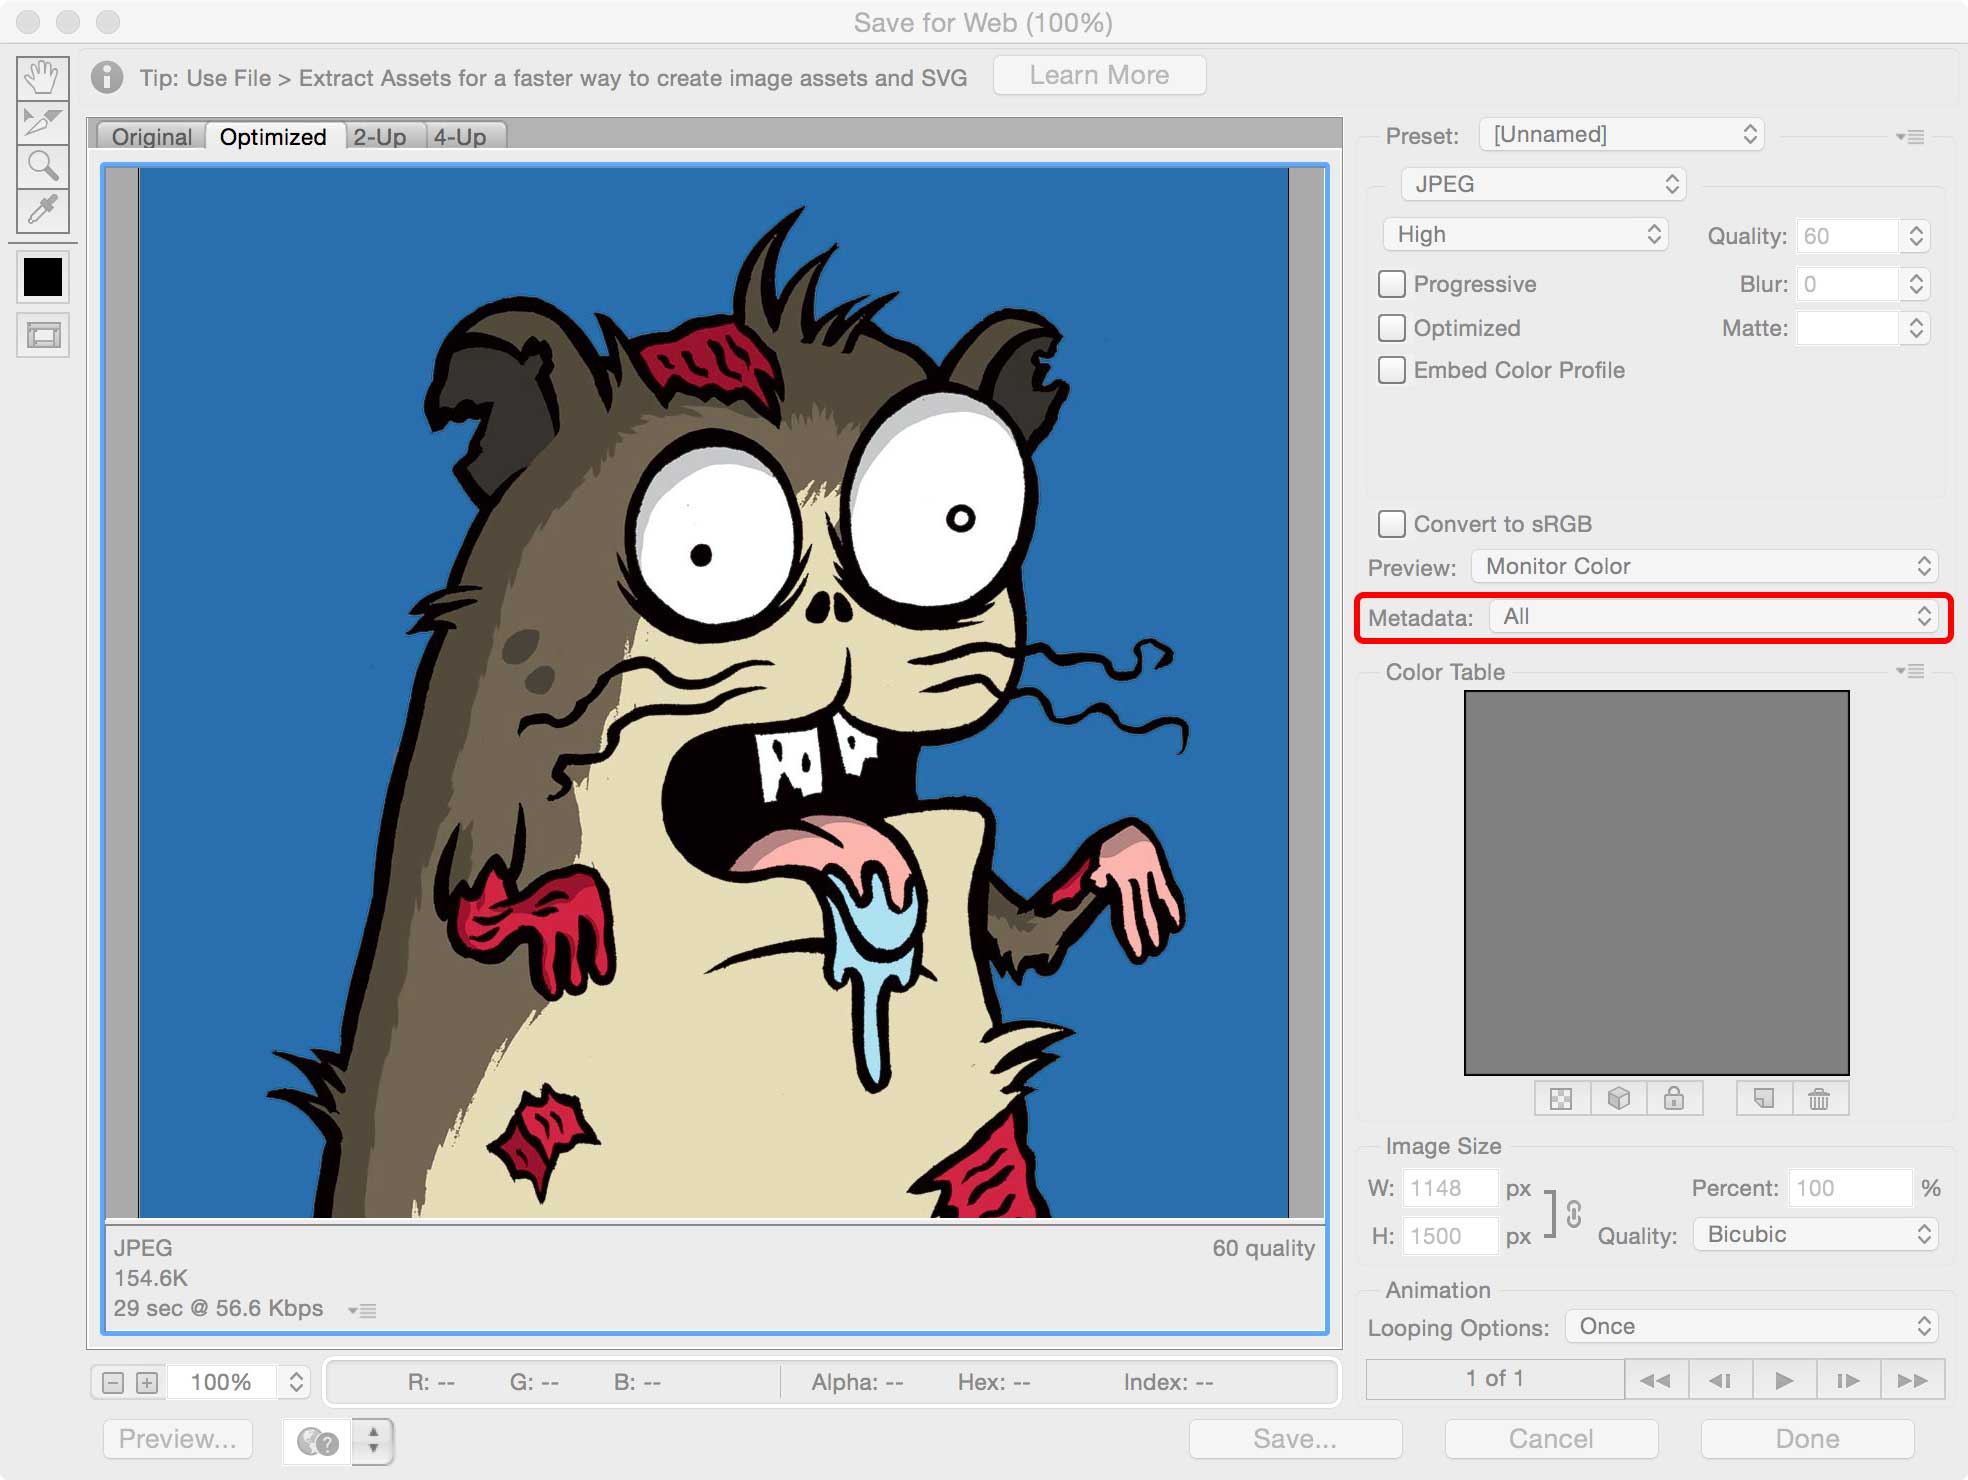
But what if you don’t want metadata? Just make sure that None is selected in the same dialogue box options on export. Additionally (or alternatively), you can run your images through Yahoo’s Smush.it service which will attempt to optimize your images by removing unnecessary data.
Watermarks
Aside from metadata, watermarks are another option for protecting your work online. You know watermarks. They’re those ghosted copyright marks that appear over your work like so:

On the plus side, they can be a great deterrent to copyright theft as they can be a real pain to clone out. On the other hand, they’re ugly, distracting, and get in the way of art directors viewing your illustrations. Again, like all the options I’m discussing, that’s a personal tradeoff you’ll need to consider.
So, how do you add watermarks? Well, you can simply set up a Photoshop template and add it to each image, using your own settings of opacity and overlay functions. Or, if your site’s built on WordPress, you can install one of the Watermark plugins and they’ll be automatically added upon upload.
It’s not the prettiest option, but it certainly is effective.
Disabling downloads
Finally, the last option I can think of is to disable downloading of your images on your website. What this will do is not allow people to right-click on your images and choose to save or download them to their local drives. It makes it a little more of an effort to steal your work.

Of course, this has some obvious drawbacks.
For one, it’s actually quite helpful for art directors to be able to save your images to their hard drives. That way, they can build up files to show to the other members of their team. Disabling that, makes their lives a lot more of a pain.
The other reason, is that it’s not that much more difficult to steal the images. All a thief has to do is take a screenshot of your website or dip into the source code to locate the image address and take it from there. So, not the biggest return for your investment. Still, something to consider.
Copyright
Of course, this last option has nothing to do with technical specifics or web settings. And there are actually no drawbacks other than a few dollars. Copyright your work before putting it online. It’s the best protection you have against art theft. No matter what you do, you’ll never entirely be able to stop a thief from taking and using your work. If one wants to badly enough, he or she will find a way. But, by having your work registered with the copyright office, you’ll be able to take action easier and with far more success.
Final thoughts
These are the most common ways illustrators can protect their images from theft. However, as explained, each comes with its own set of drawbacks and none are fool-proof. If a thief wants your work badly enough, he’ll get it no matter what. It’s just a matter of how difficult you make it for him vs. the tradeoffs of actual real users and art directors visiting your site. Of course, your best bet, is still to have all your work registered with the U.S. Copyright Office for the maximum protection.
As retina displays increase, the files we post online will actually be larger and higher resolution than what gets sent to print. Because of this, theft protection is an even more important discussion than it was a few years ago. So, what suggestions do you have? How do you protect your work against theft? Any bright ideas or interesting thoughts, leave them in the comments below!
Adding metadata via Photoshop may look like a lot of work, but it’s actally super easy if you record the action once and re-use/play the recorded action when needed (which is what I do)
Great advice! You can also create a metadata template in the metadata options and then apply that to each new file you create using the import/export option I believe.
Thank you, Neil! This is really important information. I read your blog regularly and always find something new for myself! I think it will be pleasure for you to hear- a lot of my friends read your blog to, because here, in Ukraine, it’s really difficult to find some information about copyright and any other protection of images, and there are still some strange things in our laws. So the main way to find necessary information for ukrainian artists are foreign blogs. Good luck to you and we are waiting for new interesting information 😉
That’s awesome to hear! I’m glad the blog is helping you guys. If you have any specific questions about things that haven’t been covered yet in this blog, let me know. If I can answer them, I’ll do a post about ’em.